Automatically send timely email to interested prospects
This post explains how to automatically send someone an email from your gmail account based on what they did on your website. I’m not gonna lie, there are quite a few steps here, but they don’t take long. This should take about 20 mins. If you run into problems, let us know and we’ll help you out.
2. Click “add segment”
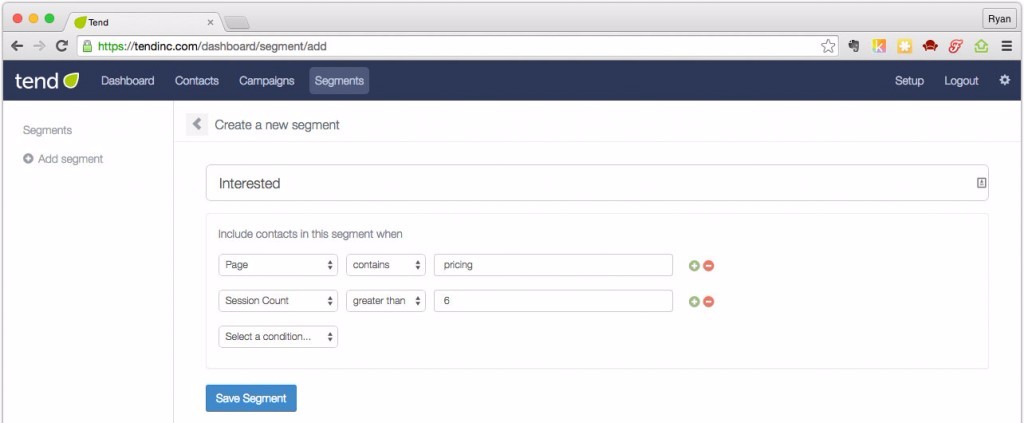
3. Name the segment, select the conditions you want and click “Save Segment”.
In this example, people who visit the “pricing” page AND who have visited the site more than 6 times will be added to the segment. Next we are going to send these folks an email automatically when they are added to this segment.
4. Create a Zapier account and log in.
5. Click “Make a new Zap”
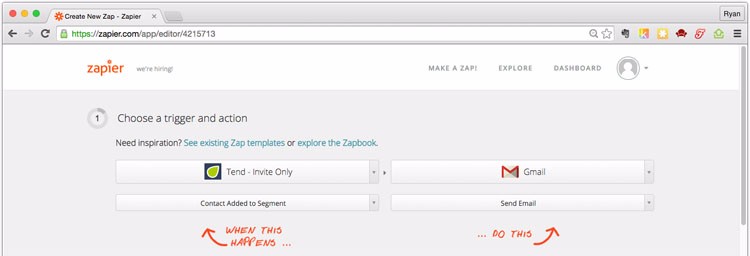
6. Click “Choose a Trigger App” and select “Tend”. Then click “Choose a Trigger” and select “Contact Added to Segment” (You could also choose other triggers for other use cases.)
7. “Choose an Action App” an select “Gmail”. Then click “Choose an Action” and select “Send Email”
8. Connect your Tend and Gmail accounts.

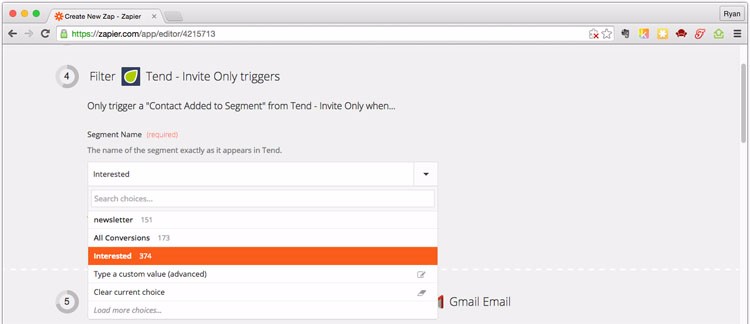
9. In this filter section, select the segment that you created. In this case it’s called “interested” so only people who are added to the “interested” segment are sent an email when they are added to the segment.
10. In the “to” field, click “Insert Fields”, then select “Email”

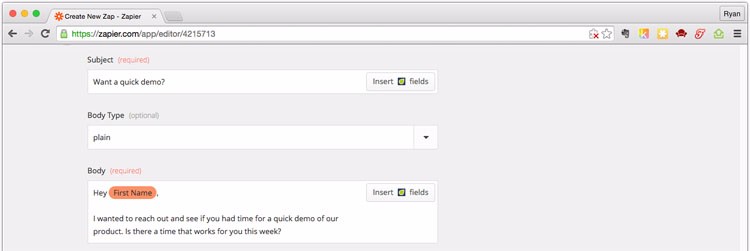
11. In the “subject” field enter the name of the subject you want.
12. In the “body” field, enter the body of the email.
13. Click “Test Tend Trigger”
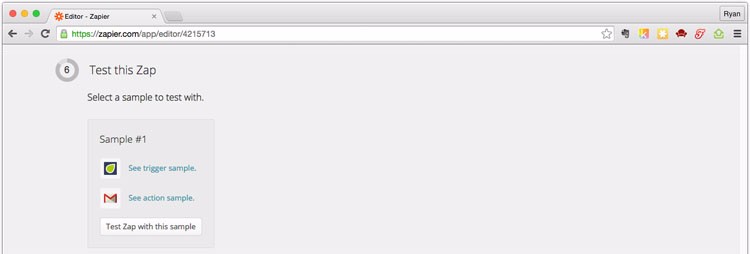
14. Click “See Trigger Sample”.
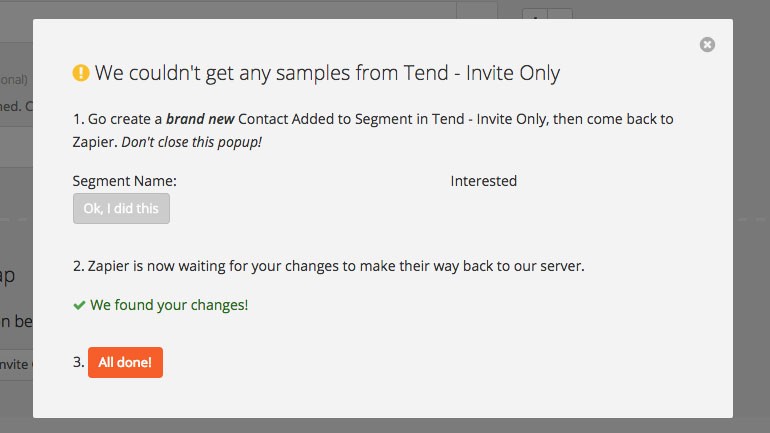
15. You are probably going to see this screen. That is simply because no one has been added to this segment yet. So you are going to need to manually add someone in Tend to a segment to send a sample to Zapier.
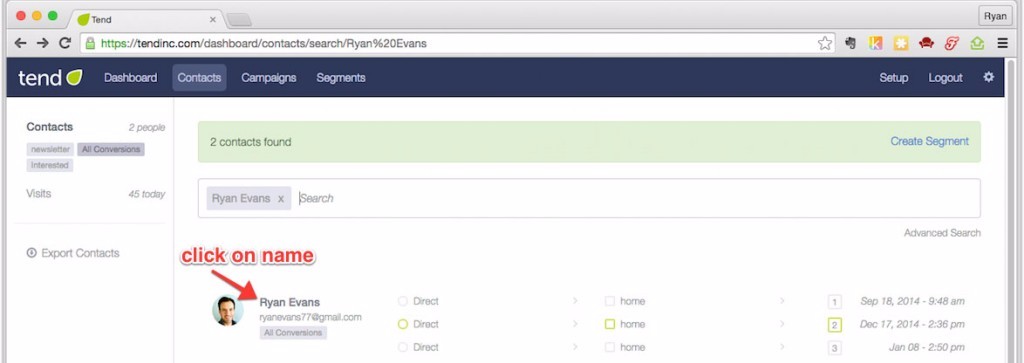
16. Go to Tend, find a contact by searching their name or email, click on their name to take you to their profile page. Then, click “edit segment”. It’s a good idea to use yourself as a contact for testing purposes.

17. Add that contact to the segment you created.
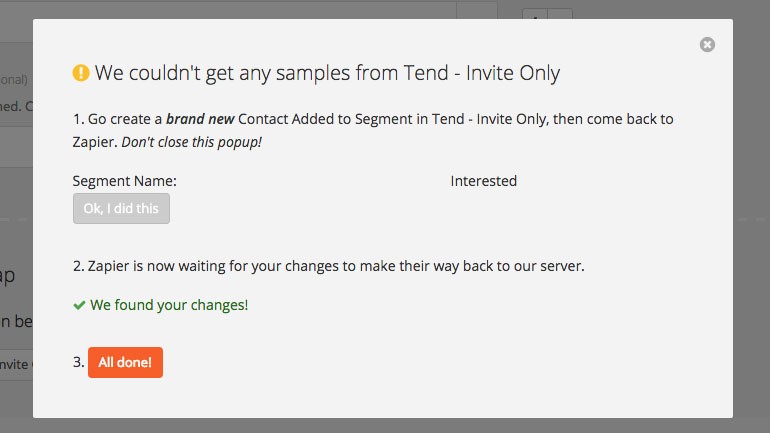
18. Go back to Zapier and click “Ok, I did this”. You should see a message that says “we found your changes”
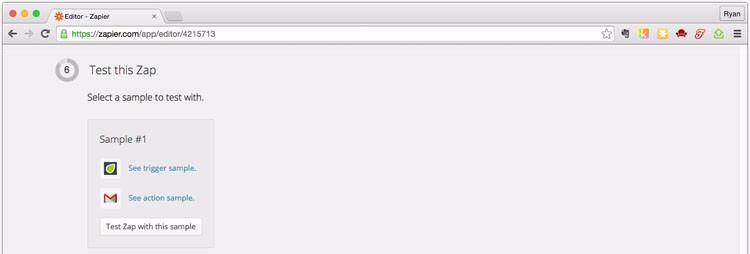
19. To send a sample email click “Test Zap with this sample” WARNING: This will actually send an email to this person. If you used yourself, go check your email and make sure everything looks right.
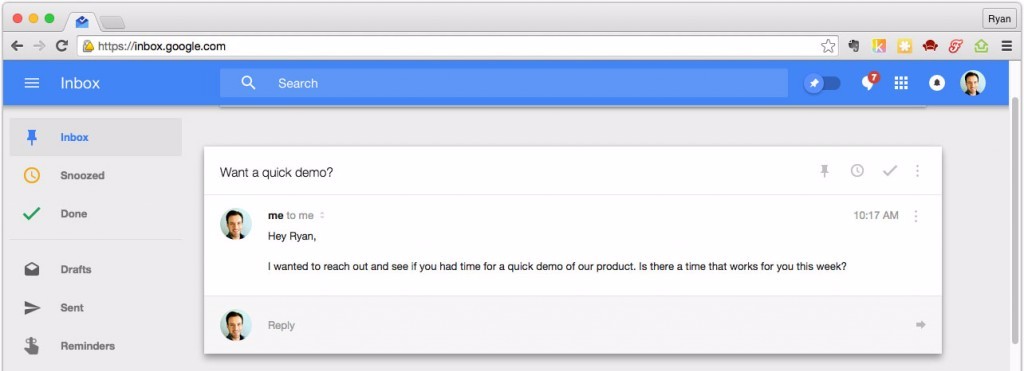
20. Enter a name for your Zap in the “name this zap” field and click “Turn Zap on”
Whew…Nice work, you’re all done :)
Now whenever people meet the criteria you laid out, you’ll automatically send an email to them.
Subscribe to our Newsletter